190
190
Before applying power to the boiler, we want to review the piping and venting components to ensure they are correct. The location of the DHW and hydronic piping will vary depending on whether you use the side or top discharge kit, as you will see in the diagram below.

Equivalent vent lengths of intake and exhaust combined.

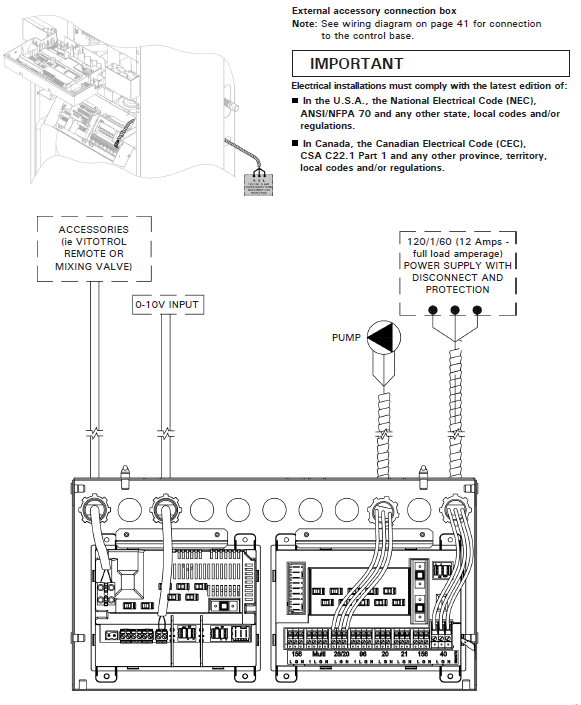
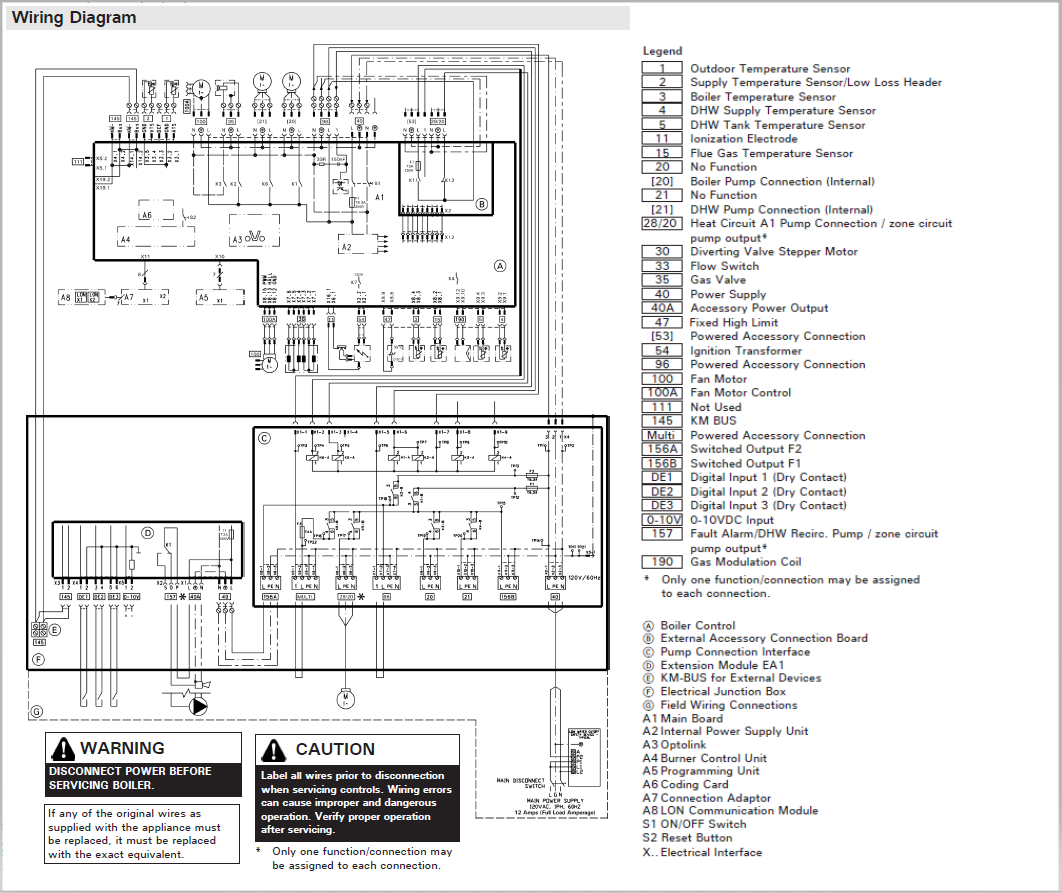
Next we want to make sure the electrical connections are correct for the application.
Once all piping, venting, and electrical connections are verified you can turn the gas on and purge the air from the hydronic piping if you haven't already. Go ahead and turn the power on to the boiler and we will begin the commissioning.
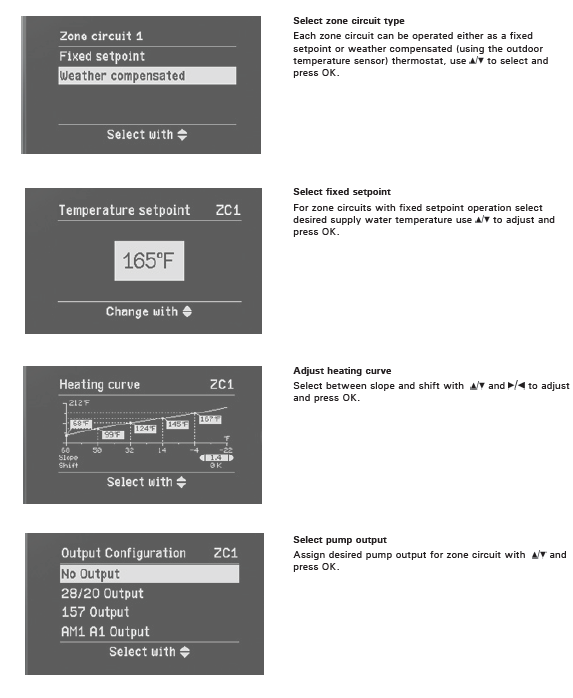
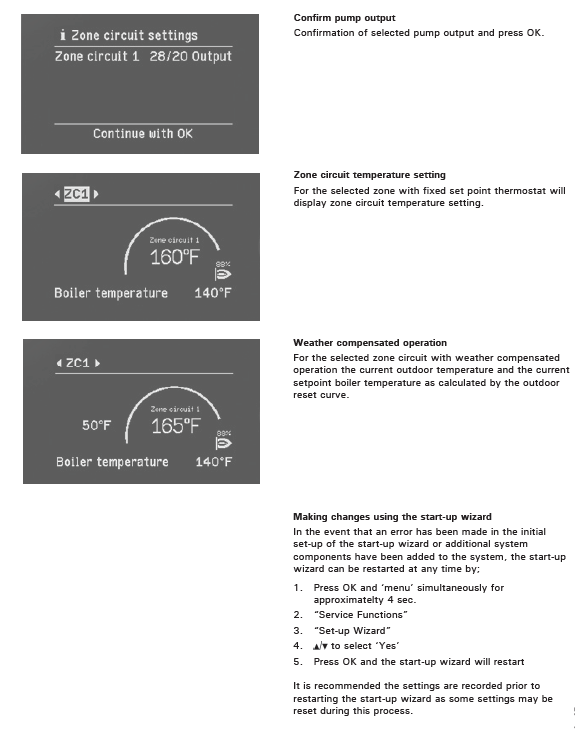
The term "Zone Circuit" on step 5 refers to the number of external demand calls you have coming into the boiler's DE terminals. These are best thought of as "TT" calls, which are usually not needed. For example, if you have a separate zone controller that is actuating zone valves and powering the system pump it is optional to connect the zone board to the boiler. Without a DE call the boiler will simply operate on on warm-weather shut-down and an outdoor reset curve or fixed water setpoint temp continuously based on the HX temp sensors. With a call to DE1 the boiler will operate on an outdoor reset curve or a fixed setpoint when the DE1 dry contact is closed. When using a demand based operation you would select "1 zone circuit". When allowing the boiler to control itself you will select "no zone circuit". See the application guide or service manual for more information on this.